Simple Knitting Tip: Make a Butterfly
Every knitter should have a secret weapon; mine is my daughter. She does just about everything well and offers terrific input for me on things ranging from outfits to blog posts to interior design. When she moves out, I will be getting a GoPro camera for each of us so I will always be able to get her opinion on whatever is happening around me. I'm kidding. Sort of.
In the meantime...one of the ways she is invaluable to me is that she taught me to make a butterfly. I am notorious for predominantly using the long-tail cast-on and as such tend to end up with a frightfully long tail. (All those little tricks to measure how much tail you'll need to cast on? No, I don't use them. Whew! Honesty feels good.) A few years ago, seeing my ridiculously long tail getting tangled in my knitting, she made me a butterfly.
Here is what you do:
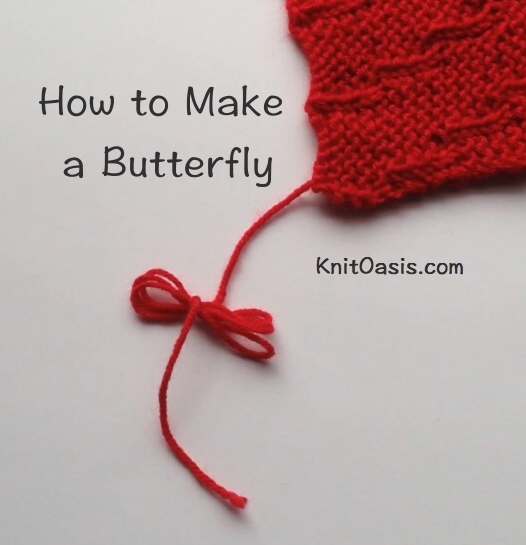
The completed butterfly. Pic A
Step 1: Tie a slip knot in the end of the tail, making a loop:

Pic B
Step 2: Take the yarn nearest your project and wrap it around your fingers (like winding up the outdoor extension cord around your arm, but smaller and with fewer bits of debris) until you have wound it all up:
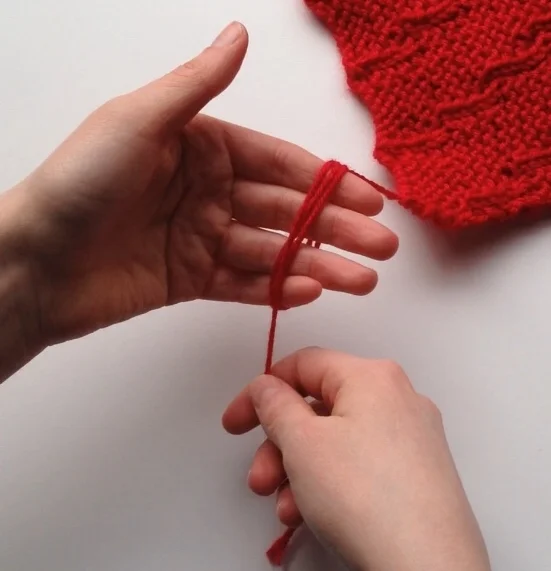
Pic C
Step 3: Slide the loop you made with the slip knot over the wound up yarn and pull the tail, tightening up the slip knot over the yarn.
You'll have pretty little butterfly that keeps your yarn out of your knitting and won't get tangled so easily with your working yarn. Nifty, ain't it? (pic A)
If you'd like to see it in motion, here's a video of the entire process:
Does your tail get tangled in your knitting? Do you accidentally pick it up and knit with it instead of with your working yarn? Here's a fun way to keep your long tail (especially if you use the long tail cast on!) tidy and out of the way.
Yes, that's right--our first video here at KnitOasis. It's not something I've tried before, but I figured it would be so much easier just to SHOW you how to do this little trick, rather than tell you. Let me know what you think!